Mod: Wii Sensor Bar with USB power supply
My Wii Sensor Bar is built of two arrays of IR-LED that get its power from a proprietary port on the Wii / WiiU. Since I have a beamer as second screen with its own Sensor Bar, a Wii-to-HDMI-Adapter and a 4x2 HDMI switch I don't want to unplug and reconnect the sensor bar cable anymore when I switch from one screen to the other.
My idea: connect one sensor bar to the USB port of the TV, and the other one to the USB port of the beamer, so both will only be enabled when the specific screen is in use. Another reason to get power from an external power supply could be that you have both, a Wii and a WiiU.
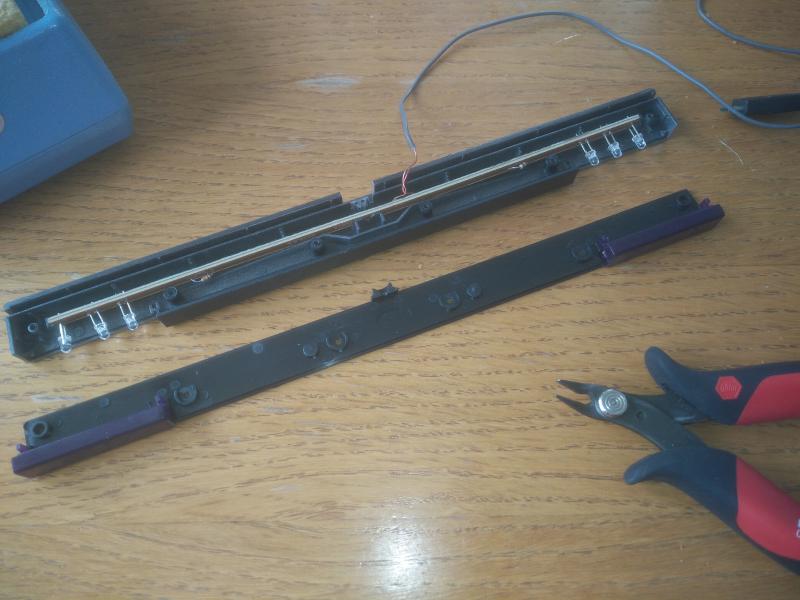
So, I've tried to find out what current and amperage the sensor bar requires, and since I did not find any reliable information I've took a screwdriver, my multimeter and had a look at it.
Important: These pictures where taken on a cloned sensor bar from ebay since
I don't have a screwdriver for the Tri-Wings Nintendo
used on the original one. The original sensor bar has five LEDs on each
side which means that you would have to short-circuit two of them when following
this guide. Otherwise you would need
a power source with a minimum current of 7.5V.
If you don't want to hack your original sensor bar and don't have a cloned one you
could also buy a cloned sensor bar that comes with an USB connector.
When measured at the connector on the Wii's backside the multimeter shows a current of 12V. But measured under load directly at the sensor bar the current goes down to 5.5V. I think this is due to the relative long cable combined with extremly thin wires, resulting in a relative high resistivity R0. However, the exact value doesn't matter since I will replace the cable anyway.

My sensor bar consists of two arrays of three LED, both having their own R1=24Ω resistors.
I'm not sure what kind of infrared LED is used but some googling reveals that 940nm seems to be
reasonable. Typical values for these LEDs are a Vf=1.5V and If=50mA, so we have 150mA on
each side and a total of 300mA a total of 100mA (thanks @ Daniel for correcting this error). The minimal required current is 3*1.5V=4.5V, which is lower than the
5V specified for USB[1] (if your sensor bar has more LEDs on each side you should bridge or remove
all but three on each side). Combined with a 10Ω resistor R1 on each side
this should be fine.

The first step is to unsolder the existing cable. Use a desoldering pump to clean the holes on the board from the old solder. Now take an existing USB cable (for example an old MicroUSB cable), remove the Type B plug and strip the isolation. You only need the wires for +5V and Ground, which are typically colored in red and black, so you should remove the other ones. Strip the inner isolation, put some solder on the conductors and connect them with the ports on the board where the original cable was connected. The holes are labed on the back side of the board with + (red) and - (black). The + conductor is connected with the first LED on both sides, the - conductor with the resistors. If you inadvertently switched the poles, this is not fatal, since diodes only allow the current to pass in one direction - but the sensor bar will not work, of course.

Next, remove the original resistors and replace each of them with a 10Ω resistor.

Now you should take your multimeter and a camera (most digital cameras are able to see infrared light) and check if the sensor bar works. For personal security I suggest to use an external power bank for this test.

If you see the IR-LEDs on the camera screen you can connect the sensor bar to your TV and test them. Maybe you have to calibrate the sensivity of your Wiimotes since the brightness might have changed, especially when you were forced to bridge some LEDs.

[1]: Please note that USB uses a low-power mode per default that does not allow a device to pull more that 100mA from the port. If a device requires more power (up to 500mA) it has to ask the USB controller for permission. Since this requires active components we do not have please ensure that no other USB devices are connected to the same port, or use a dedicated USB power supply.